Published on 06/05/2018 | Operations

Researches of SW R&D teams show significant improvements in all R&D and operation metrics when proper continuous integration and delivery processes were implemented (take a look at this case study). We thought it would be highly beneficial to demonstrate how to apply these practices to embedded SW teams. Applying continuous integration and delivery for embedded SW development is not an easy task as you have a physical device with many constraints when it comes to rapid testing. However, the gained benefits outweigh the effort.
In this post, I’ll outline a guideline for building such a process for embedded SW development. Note that it is relevant even if your company privacy policy implies restrictions on using cloud services for source control and other CI/CD tools. This post will be focused on the IT infrastructure and tools you need in order to implement CI/CD process in your organization.
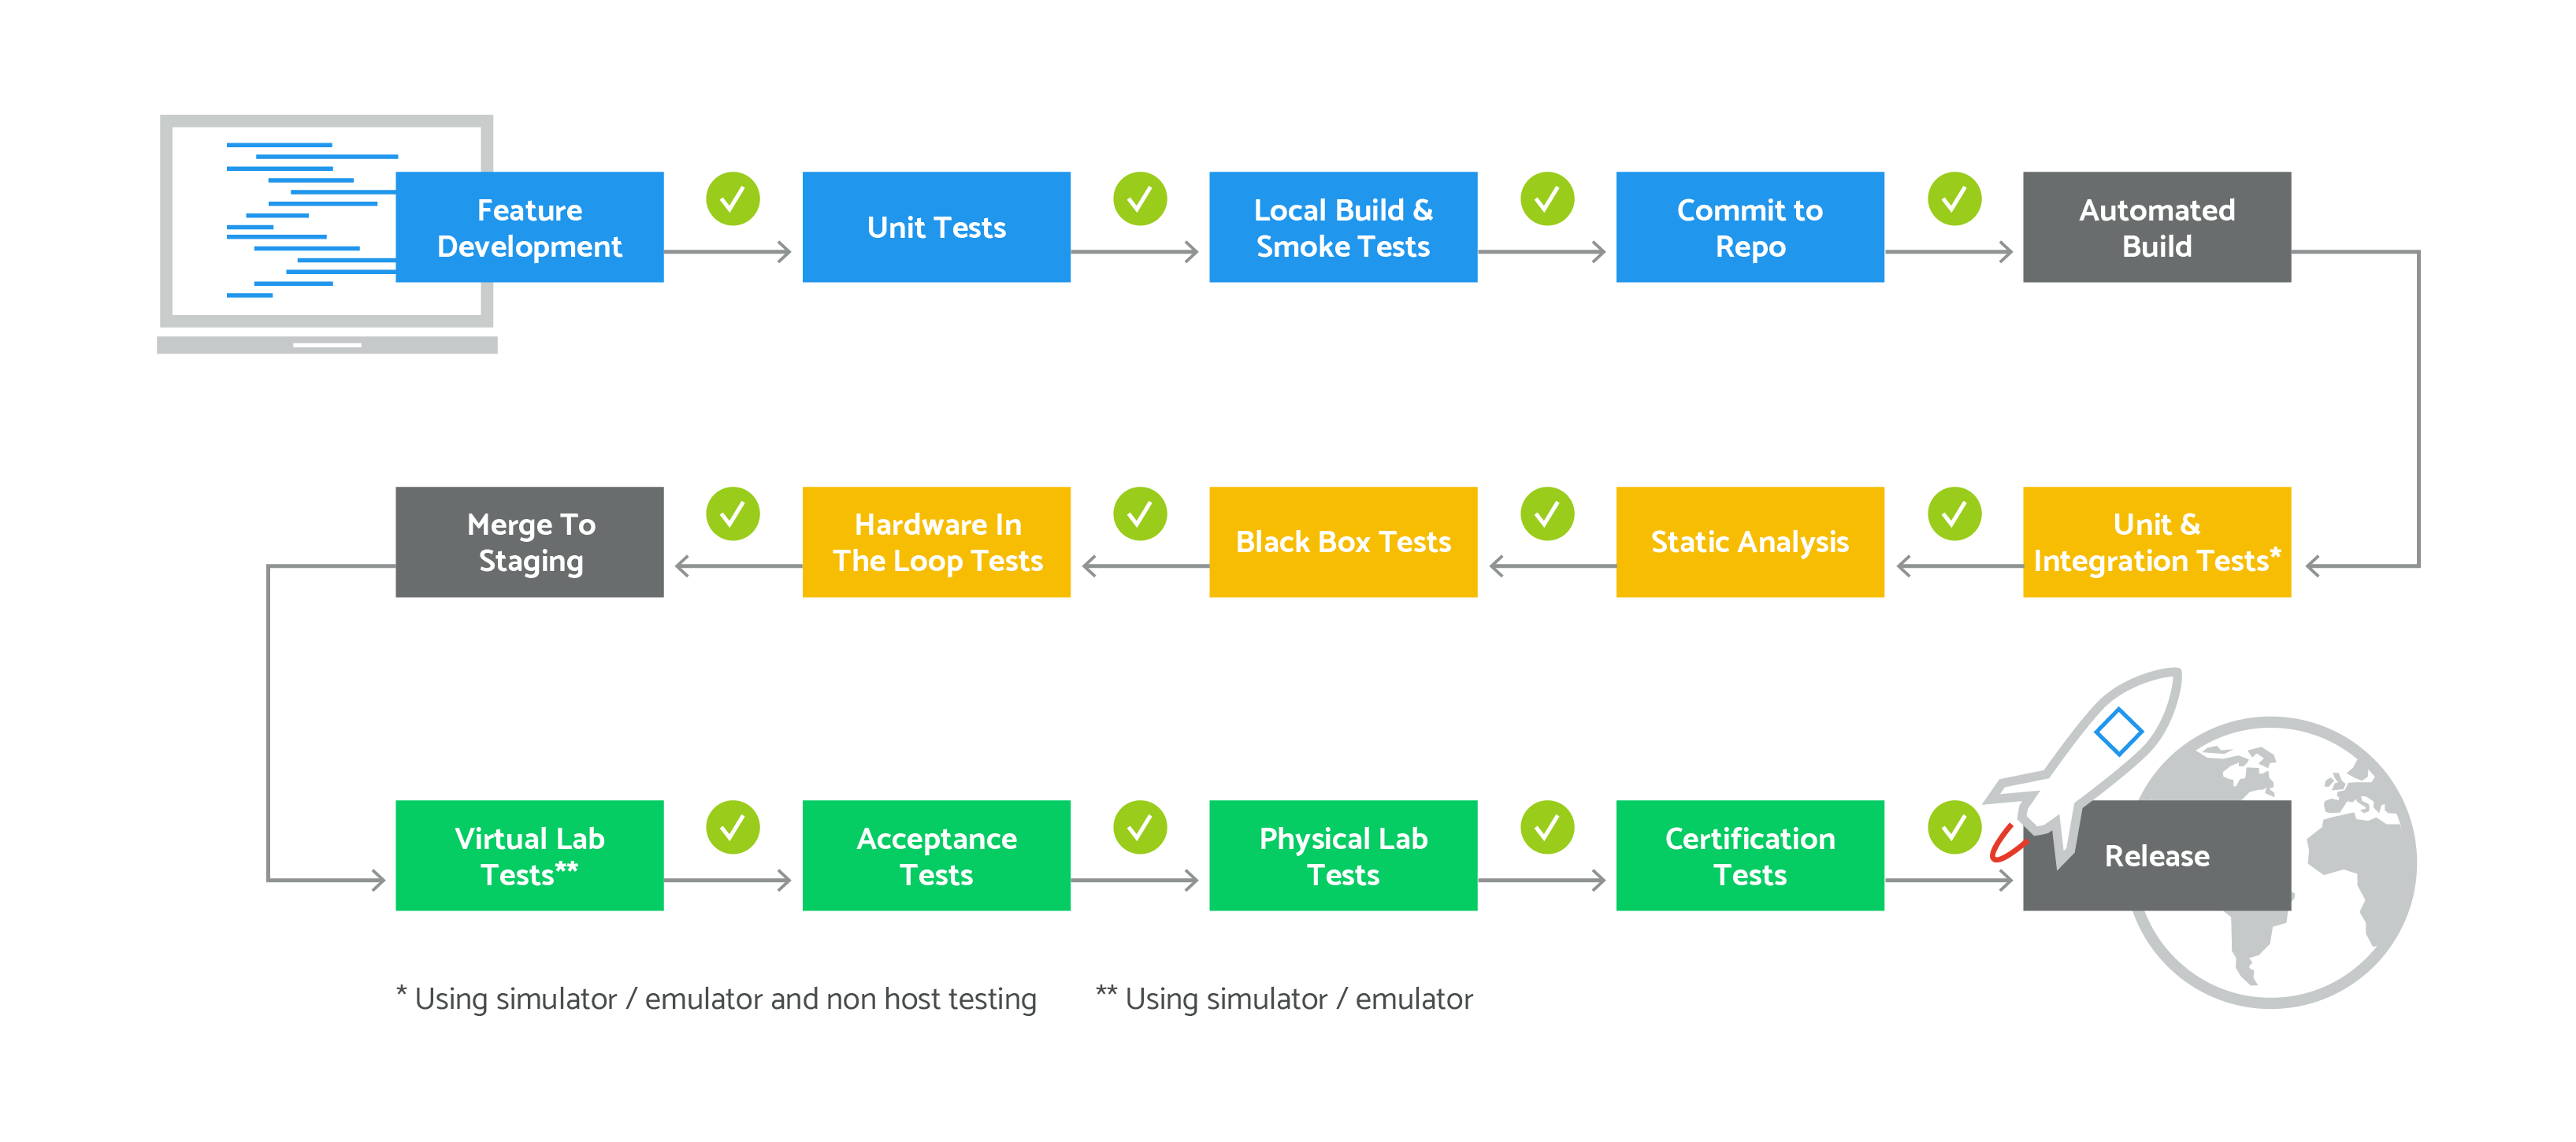
The basic CI/CD flow for embedded SW development will be one of this kind
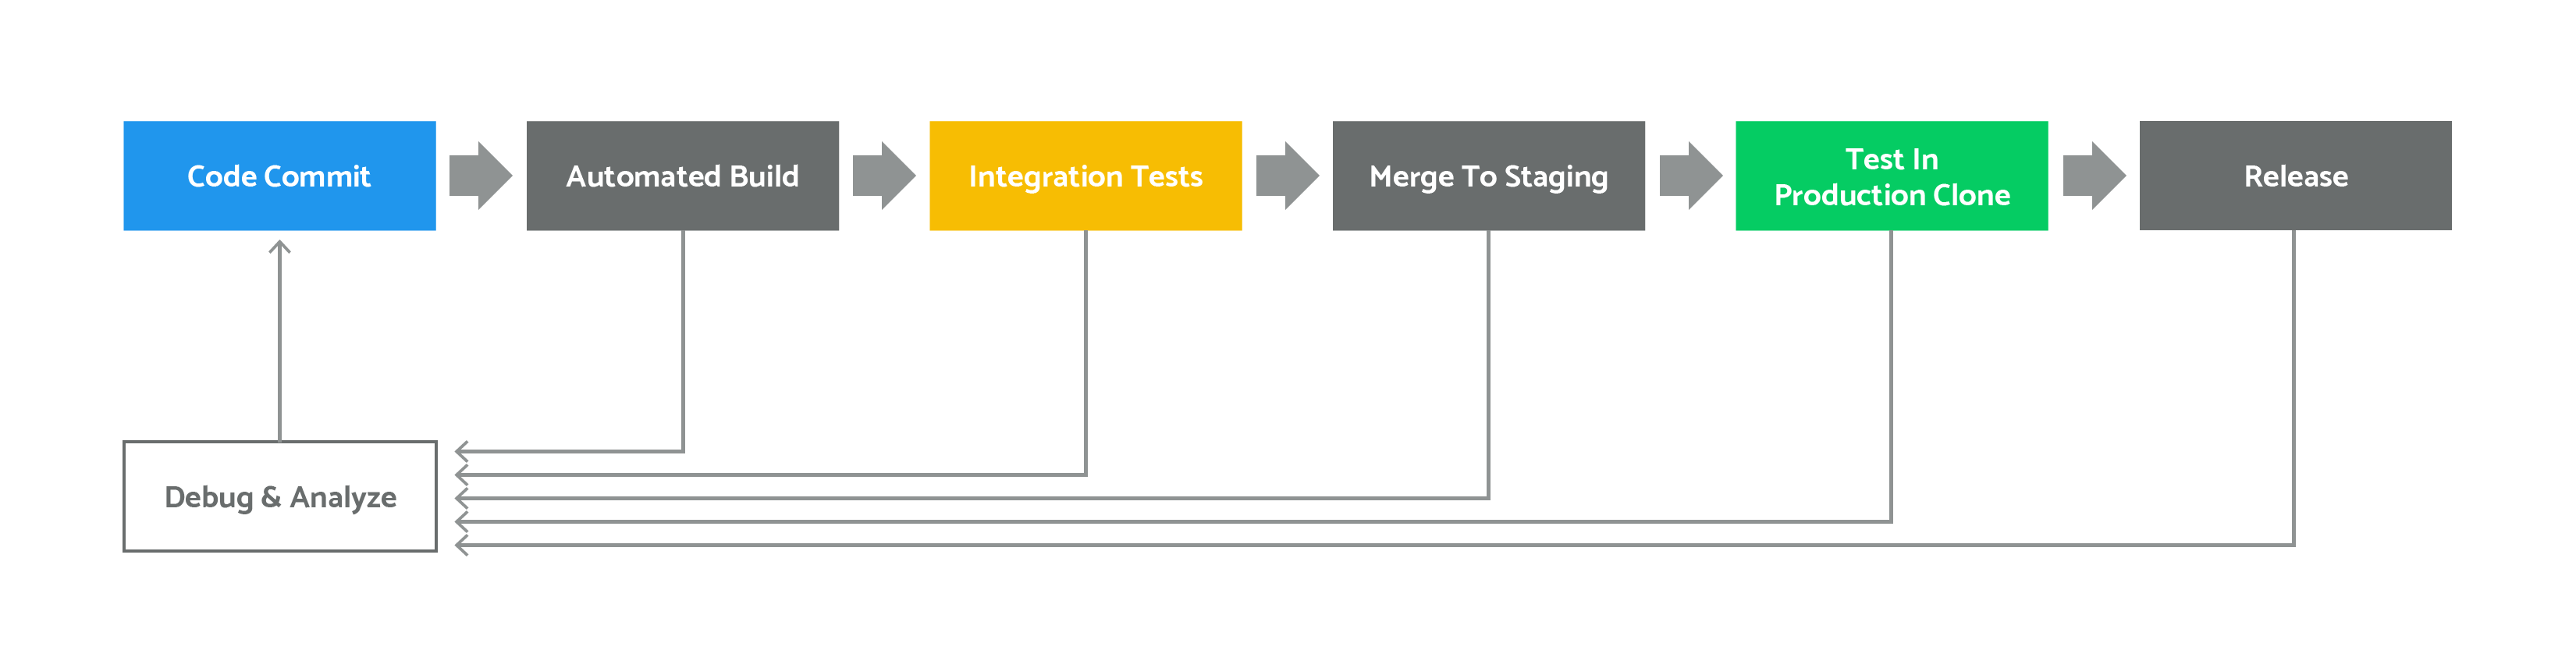
Let’s dig down further and discuss the details of our suggested flow:
We chose to work with the Git Flow proposed by Vincent Driessen. In a future post we’ll dig down further and discuss how to implement Git Flow for embedded SW.
To enable this, we propose the following IT infrastructure.

When building a CI/CD IT infrastructure for embedded SW we decided to use more flexible tools that can work on-premise and as hosted cloud services (there are companies that have strict privacy and security policies which prevent them from using hosted cloud solutions). Additionally, toolchains such as IAR that have a node lock license, and when doing on target tests, you must have an on-prem server to serve as your test harness. All of these components run on VMs (either windows or Linux ones). We decided to use different VMs for different types of test for modularity and support for future infrastructure updates.
We decided to use Jenkins as our CI/CD manager. Jenkins can run on-prem and on the cloud, on Windows/Linux machined, supports HiL tests and everything you need for embedded SW development. We are also very familiar with it, so it was a straightforward choice for us to make.
We decided to use GitLab as it supports both on-prem and hosted cloud service. GitLab has a very friendly user interface and reliable plugin to Jenkins. In an on-prem scenario, we also connected the VM to a central backup service. If you don’t have an on-prem constraint, GitHub is probably the way to go.
Our build server will also perform static analysis tests. For a build server, we used one of the two options:
A Linux based VM, where you can run all non-target tests — unit tests and module testing with mocking. Our favorite tools for unit tests for embedded C are the tools provided by ThrowTheSwich.org — Unity, CMock, and Ceedling.
A Linux based VM, where you can run your binaries on a simulator of your devices and your entire system. There are few options for that like Synopsys’ VDK, WindRiver’s Simics, QEMU, Mentor’s Vista, etc. We recommend our own solution — Jumper’s Virtual Lab (we’ll have a different post covering this as well). A proper simulation/emulation environment should allow you to run-
A Linux/Windows VM (the physical server should be located in the physical lab), where you can run tests on the target HW. This server will act as the testing harness or will be connected to an external HW testing harness. This server will control lab testing equipment such as scope, network analyzer, voltmeter, logic, packet generator, etc. We haven’t chosen specific testing framework here, as it depends on the specific device and system setup. On the target device and physical lab you should run -
The fundamental requirement for CI/CD flow is to have a fast feedback loop from code commit through integration to test results. The way to get there is through automating your process and mainly having automated tests. At Jumper, we’ve built a Virtual Lab platform to streamline CI/CD and automated testing. Jumper’s Virtual Lab allows R&D and QA teams to have a virtual production clone that runs the same physical device’s software executables with complete environment and communication simulation.
---
If you work with embedded systems and want to have an easy way for testing your physical device’s embedded software, you’re invited to try Jumper and contact us at contact@jumper.io to learn more.
Building an infrastructure for CI/CD in your organization will require some effort from your R&D and DevOps/IT teams. It will require new budget allocation to buy tools to support this process, and you’ll probably need to implement new development practices with your R&D team. Nevertheless, when it will be fully embedded into your R&D cycle you’ll get significant ROI very soon.
This article was written by Yaniv Nissenboim, the Co-Founder and VP Product at Jumper Labs. Yaniv has over 18 years of experience in building Embedded Systems (SW and HW) and products.
Jumper makes it fast and easy to test and build embedded IoT software. Jumper eliminates the hassle of testing on hardware devices using a unique behavioral simulation. Unlike testing on hardware, Jumper’s simulation is consistent, predictable and easy to automate.
With Jumper you benefit from 40% faster time-to-market, 20% increase in delivering new features, while decreasing a production error response time in an order of magnitude.
This article first appeared on Medium.