Published on 07/25/2016 | Technology

R&D and product development costs have bankrupted many IoT startups. Luckily the drive to build an MVP and establish product-demand fit does not require a corporate budget. A new class of micro-computer is enabling fast, simple, and very low budget prototyping. One standout in the market is the Raspberry Pi. This guide will demonstrate an IoT startup can use a Pi to create intelligent connected devices for less than the cost of a movie ticket.
#1 - Build Fast, Build Cheap
Iterations and user input are far more important than perfection. Aim for your first MVP within week #1 of a new project kick off. And why not within day #1?
#2 - Leverage the Community
There is a strong community of Pi hackers and component suppliers to advise you when you encounter time-draining implementation barriers.
#3 -
#4 -
#5 -
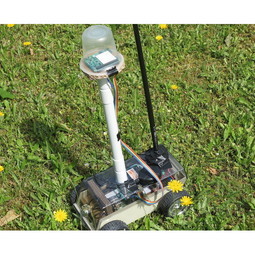
The Pi is an excellent choice for proof of concept work. You can quickly produce a working model to enable market research and to test use case concepts. The Raspberry Pi Zero runs Raspbian and can support most applications. It also easily integrates with mini-HDMI and micro-USB adapters, enabling it to serve as the foundation for a connected device.
The Raspberry Pi® Zero is a $5 powerhouse. It features a Broadcom BCM2835 application processor, 512MB of LPDDR2 SDRAM, a micro-SD card slot, a mini-HDMI socket for 1080p60 video output, micro-USB sockets for data and power, an unpopulated 40-pin GPIO header, an unpopulated composite video header and the smallest ever form factor, at 65mm x 30mm x 5mm.
To build this your Raspberry Pi prototyping kit will need...
- A Raspberry Pi 2 Model B
- An Adafruit Perma-Proto HAT for Pi Mini Kit
- Two 0.1" (2.54mm) female pin header strips
- A SYB-170 breadboard
- An Raspberry Pi Case
- A double-sided sticky pad
- Wire
The tools you will need are...
- A soldering iron
- Wire cutters/strippers
- A lump of blue-tack
- A needle file
- A sharp craft knife
You may want to begin by building a case is optional to provide an extra layer of physical protection and to more easily harness your Pi to external devices. Once you assemble the parts simply slide the Raspberry Pi in and lock in the final wall. Finally, push down the two hooks at the top of the box so they clip shut. To disassemble, push the end parts up and unhook from the top.
Next, solder the Pi HAT female header socket. Attach the main female header socket to the Raspberry Pi. Put the connector flat on the bench with the board resting on it and push the tack in so it stays level when you let go. Now you can begin soldering by tinning the soldering iron and placing it so it touches a pin and the Pi HAT simultaneously. Then apply solder between the pin and the Pi HAT, count to two (Mississippi), and remove the soldering iron. Repeat for all 39 pins.
Now we’re ready to solder the female pin header strips. Start by accessing the GPIO pins. Cut the strips to the right length by putting one in the Pi HAT so it exists one and overshoots by the width of your thumb. Cut the strip and file it clean. Next solder this on to the top side from the bottom side. Then repeat for the remaining strips.
Now it’s time to add the jumper wires to connect the vertical headers to 5V and GND. First, strip and tin a short length of wire. At the same time, add solder to the 5V hole nearest the vertical header pins. Place the wire on top of this soldered hole and wait until the solder melts and fuses together before removing the soldering iron. Repeat with the same wire and the bottom of the end vertical strip before finally cutting off the excess wire.
Before adding the bread board to the top of the shield you should first remove any extruding tabs with a sharp knife. This will allow several boards to be joined together. Remove the film from the sticky pad under the breadboard and place one end on the Pi HAT. Finally, slowly lay it down and press firmly into place.
Congratulations, you’re ready to plug the Pi HAT into the Raspberry Pi and begin working on your prototype! Make sure to download the latest operating system from the Raspberry Pi website and install Wiring Pi to enable the GPIO port.
Prototyping is one of the most rewarding stages of product development, especially when you use a solution such as the Raspberry Pi that enables quick iteration. This is where you see your idea transformed into reality. Of course, what that reality looks like depending on your budget. But with new components like the Pi, it is easier than ever before for an entrepreneur to develop working hardware to demonstrate an idea without an enterprise-size budget.
Now that you have your technical foundation in the Raspberry Pi, it is important to identify the goals of your prototype. Here are a few of the more common goals of prototyping.
1. Refine the functionality of your design by presenting it to potential users for testing and feedback. Theory is the natural starting place of many great ideas but it’s not enough to justify the expect of product development. Only by physically testing a working model will you understand how the device will be used in practice. You’ll identify unforeseen user behaviors that will inspire new design elements.
2. Prototyping also allows you to test diverse materials and form factors. By working with heavy constraints, you’ll determine which materials and designs work at a low cost. This is a crucial part of product development since it forces you to break out of the ‘ideal case’ thought process and deeply consider practical constraints.
3. The first versions of your prototype will inspire your team, your investors, your potential customers and yourself by bringing your idea to life. There is a vast gulf between an idea, even one that is meticulously documented, and a physical device that can be tested. Until an idea is prototypes it is difficult to take it seriously. Once you arrive with a prototype in hand you immediately gain credibility.